St. Valentine’s Day is coming up tomorrow, and we are finally starting to get ready! With a birthday just one week before Valentine’s Day, I never seem to have the time to do all the things I would like to do, to get ready for this fun feast day.
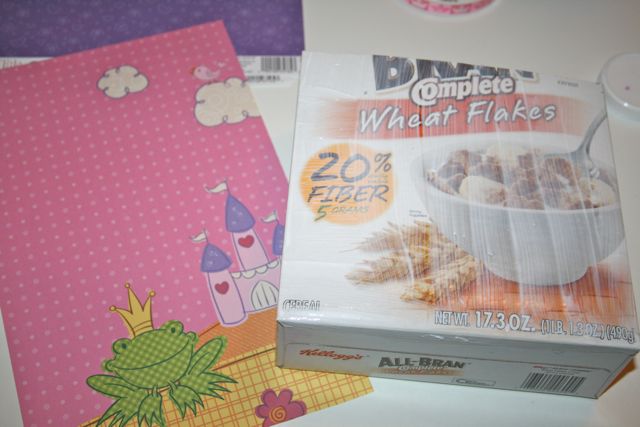
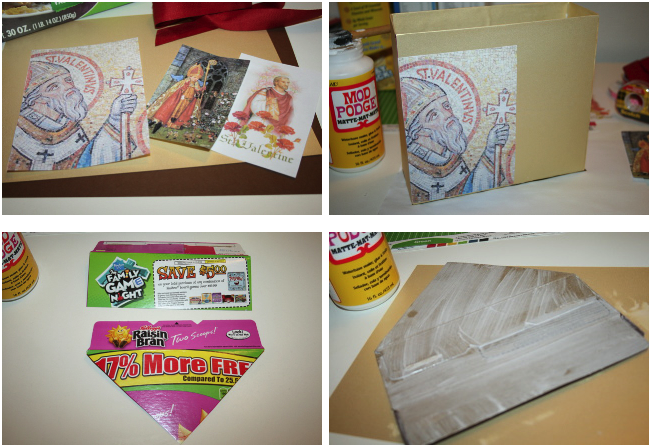
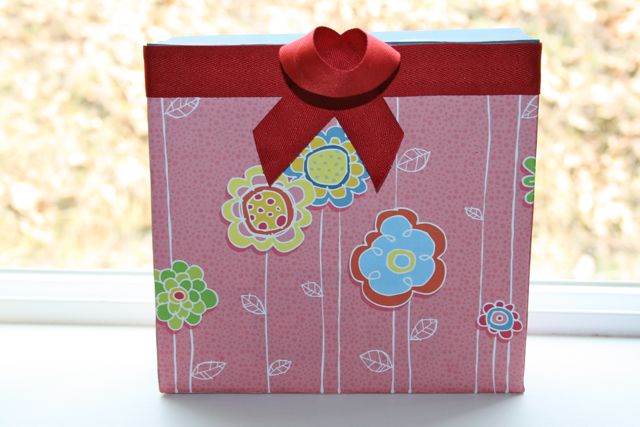
Every year we have wanted to make “Valentine Mailboxes” and just never have had the opportunity. . . (My kids always end up using a shoe box or paper/gift bag for the cards they receive.) This year, inspired by the darling Pottery Barn Kids Valentine Chair Backer and a number of crafty versions on Etsy, we decided to make our own using some empty cereal boxes, scrapbook paper, images of St. Valentine and ribbon.
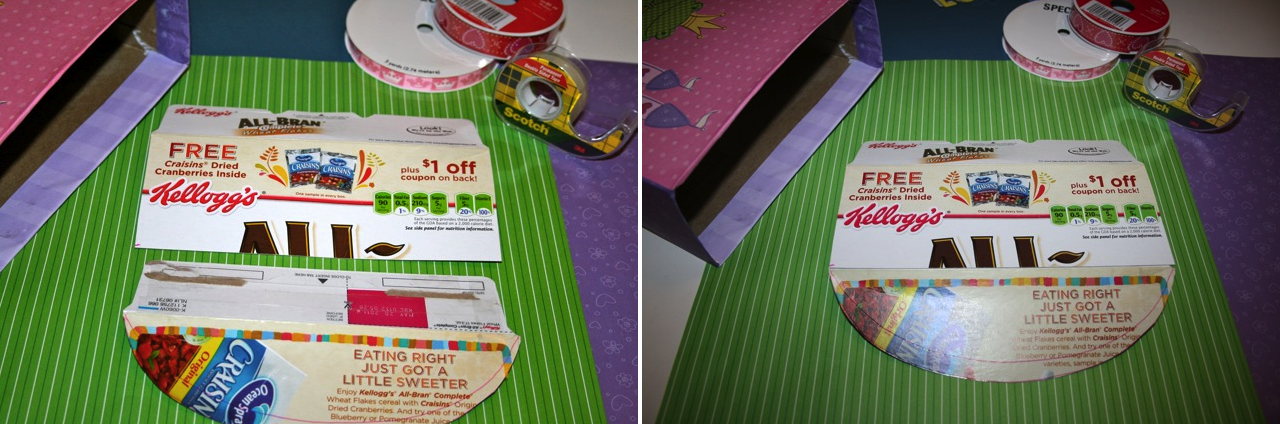
First I cut the box, measuring 7″ from the bottom to form the base for our mail box. I cut down the side of the box first – saving the front and back to make the top flap.
Next I put Mod Podge all over the front to attach the scrap book paper. I cut it slightly larger than the front and then trimmed where/when necessary. I then continued to attach the paper to all the sides and bottom of the box.
After that I took the remaining cereal box and made a flap. I used double sided tape to stick the two pieces together, as shown in the picture above, before covering both sides with scrapbook paper.
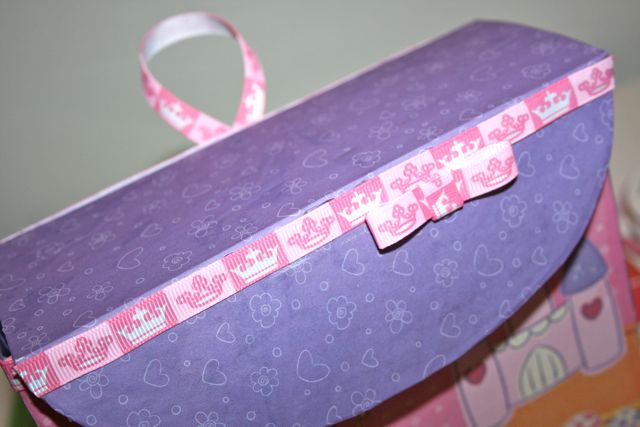
Next I burned the heck out of my finger hot glued a ribbon around the top of the box… Note the bowl of ice/water in the picture! 😉 Now you all know why I prefer to “craft” with food and melted chocolate!
We added a little more ribbon to the front flap, strategically covering up a little tear in the paper with our “bow” and adding a loop to the back for hanging the box.
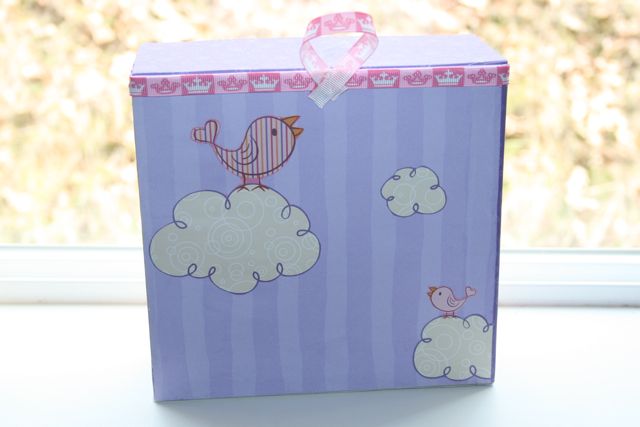
We also cut out the birds and clouds from the leftover scraps of paper and glued them onto the back.
I thought it turned out darling!
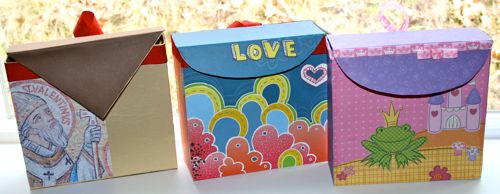
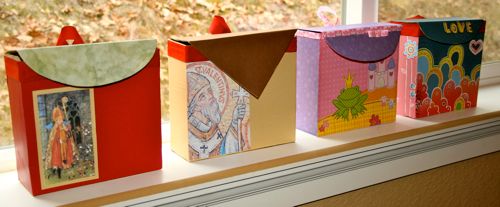
After Twinkle Toes’ Princess Mailbox was finished, Rascal and I started on his. Quite appropriately, he opted for a
real Saint Valentine Mailbox.
Rascal still is trying to decide on a quote to add to the right side of the box.
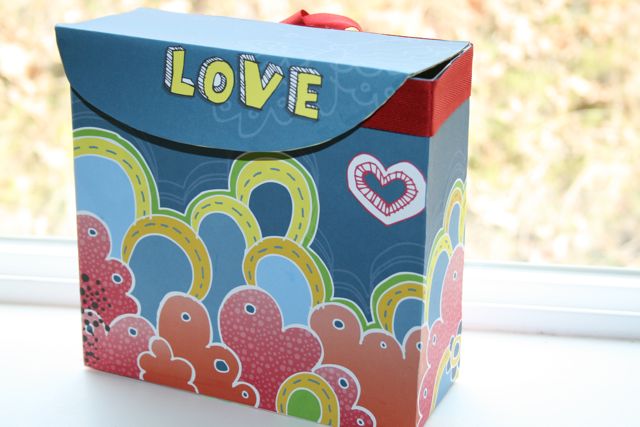
Next up was Chiquita’s mailbox.
She also really enjoyed picking out her scrapbook paper.
She was very happy that we were able to line up the butterfly to fit on the top flap…
… and she loved the cheery flowers for the back.
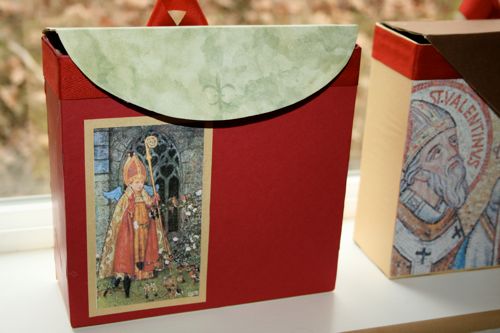
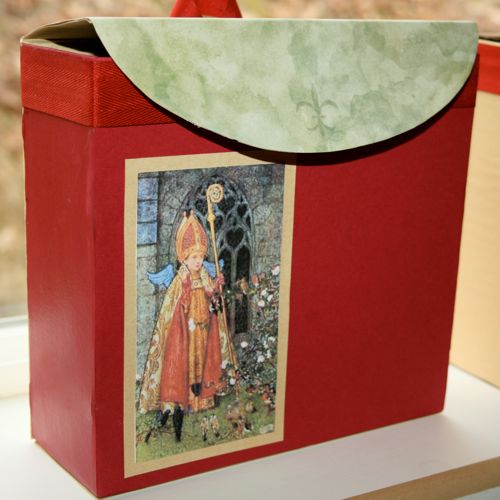
Captain also decided to use a picture of St. Valentine, along with some “
camouflage” looking paper with fleur-de-lis, a symbol for Our Lady. He was very pleased with the results. Like Rascal, he too is trying to decide on a quote to add to the front.
Now if we could just finish up the actual cards, and make one or two more mailboxes for Snuggles and Rose… we will be almost ready for tomorrow!
Prayer of Mothers
Father in heaven, grant me the grace to appreciate the dignity which you have conferred on me. Let me realize that not even the Angels have been blessed with such a privilege—to share in your creative miracle and bring new Saints to heaven. Make me a good mother to all my children after the example of Mary, the Mother of your Son. Through the intercession of Jesus and Mary I ask your continued blessings on my family. Let us all be dedicated to your service on earth and attain the eternal happiness of your kingdom in heaven. Amen.
")


so cute. I can't wait to share the little crafting I did for the kids. But I also did something for my husband so I can't post the post until after I give it to him in the morning. Happy Valentine's Day to you all. much love.
I love these…….they are two cute! We spent all our time making one for the family as a whole. For the first-time ever we are having a large Catholic Homeschool Valentine Skate Party. There will be over 55 families so we are only doing one valentine box per family! I plan to book mark this idea for the future. Thanks for sharing.:0)
This is a good idea and really cute.
We have a huge St. Valentine park day/activity day set for Friday. These would be perfect for the kids.
Sorry to hear about your finger. Those things can really burn.
These are gorgeous! What a cute idea.
very very cute. Thanks for the clear tutorial!!
Very Cute! I want to save this idea for next year! Where did you get the picture of Saint Valentine on the red box? It is really neat!
Thanks everyone! It sounds like some of you have some fun parties coming up this week! 🙂 I hope you all have a very Happy St. Valentine's Day!
Katie ~ I ran across it in a google search when looking for images of St. Valentine. Captain liked it since it immediately reminded him of Charlotte's Coloring page. I'm sure it is the one that she used as her inspiration. I know she modified it some, but since I printed off her St. Valentine Coloring Page again for this year (my kids love it!), I decided to also use the original on top of our cupcakes too. It's such a cute picture, despite the cupid wings. 🙂
These are absolutely adorable! I was racking my brain for something cute. We will definately be doing this next year!
Thanks for more wonderful ideas and resources,
Jessica! God bless your family.